


If you’ve ever walked through a machine shop that runs wire EDM or sinker EDM, you’ve probably noticed the hum of precision components moving in tiny, controlled increments. For us— a supplier focused on EDM stepper motors—we see this hum as the backbone of consistent EDM work. Over the years, we’ve fielded dozens of calls from machinists and engineers frustrated by uneven cuts, lost steps, or premature motor wear. Nine times out of 10, the problem comes down to a simple mismatch between their EDM stepper motor and gearbox.
Today, I’m pulling back the curtain on what we’ve learned from working with shops of all sizes, from prototype labs to high-volume production facilities. Matching an EDM stepper motor to a gearbox isn’t just about picking any unit that fits physically. It’s about aligning torque, speed, precision, and the unique demands of EDM processes. Let’s break this down step by step, so you can avoid the headaches we’ve seen too many times.
First, let’s start with why EDM needs a gearbox in the first place. EDM relies on controlled motion: a wire feed needs to move evenly through the work area, a Z-axis head needs to maintain a precise gap with the workpiece, and rotary axes (common in 4-axis EDM) need to turn with micro-level accuracy. Stepper motors, while great for open-loop control, often don’t have enough torque at low speeds to handle the loads EDM systems face—especially when you account for the weight of components like wire guides or the resistance of the dielectric fluid.
That’s where a gearbox comes in. A gearbox multiplies torque while reducing speed, which lets your stepper motor deliver the exact force needed without overworking. But not all gearboxes are created equal for EDM. For example, a gearbox designed for conveyor belts won’t hold up to the repetitive, precise loads of a wire EDM’s wire feed. The wrong match can lead to skipped steps (which ruin cuts), excess wear on your motor and gear teeth, or even complete system failure mid-job.
Step 1: Map Your EDM System’s Load Requirements
The first rule of matching is to know your load, not just your motor. Every EDM application has unique load demands, and getting this right eliminates 80% of mismatches. Let’s talk about the key load factors you need to calculate.
First, identify the axis your motor is driving. Is it the wire feed axis? The Z-axis? A rotary axis? Each has different loads. For wire feed, the load comes from guiding the thin EDM wire through the Wire EDM Wire Guide Die, the tension in the wire, and the friction from the drive mechanism. For the Z-axis, it’s the weight of the head assembly, plus any downward pressure needed to maintain the spark gap. For rotary axes, it’s the torque required to turn fixtures holding large, heavy workpieces.
Next, calculate the total load torque (T_load) that your motor has to overcome. This isn’t just the static weight—you also have to account for dynamic loads like acceleration and deceleration, plus friction. A common mistake here is only using static torque, but EDM systems make frequent small moves, so dynamic torque is critical.
Let’s use a wire feed axis example: Suppose your wire path includes a Wire EDM Wire Guide Die that adds minor friction, and the wire itself has a tension of 0.5 N. The drive roller for the wire has a radius of 10 mm, so the tension torque is 0.5 N * 0.01 m = 0.005 Nm. Add friction from bearings and the guide, and your total T_load might be around 0.015 Nm at the drive shaft. But wait—this is at the gearbox output, not the motor shaft. To get the motor’s required torque, you have to divide by the gear ratio. That’s a key math step most people miss.
Dynamic torque is even more important. If your wire feed needs to accelerate from 0 to 10 mm/s in 0.1 seconds, you have to calculate the inertia of all moving parts (the wire, drive rollers, guides) and add that to your torque. EDM’s micro-movements mean acceleration is constant, so underestimating this leads to skipped steps. We once had a customer who cut a 1,000-part run with 200 bad pieces because they ignored acceleration torque on their Z-axis. They had to replace both their stepper motor and gearbox 3 days into the job—costing them thousands in downtime.
Step 2: Understand Gear Ratios and How They Interact with Stepper Motors
Once you have your load torque, the next variable is gear ratio. The gear ratio (GR) determines how much the gearbox multiplies the motor’s torque. The formula is simple: Motor torque (T_m) = Load torque (T_load) / Gear efficiency (η) * GR. Wait—gear efficiency matters too. Most planetary gearboxes (the best type for EDM) have an efficiency of 90-95%, while older spur gearboxes can drop to 70-80%. A lower efficiency means you need a motor with slightly higher torque to compensate, so don’t overlook this.
The ideal gear ratio is one that lets your stepper motor operate in its sweet spot. Stepper motors have a torque-speed curve: at low speeds, torque is high, but as speed increases, torque drops. EDM often needs low-speed, high-torque motion, so a gearbox lets you run the motor at a higher speed (where it’s most efficient) while the gearbox reduces that speed and boosts torque to meet your load.
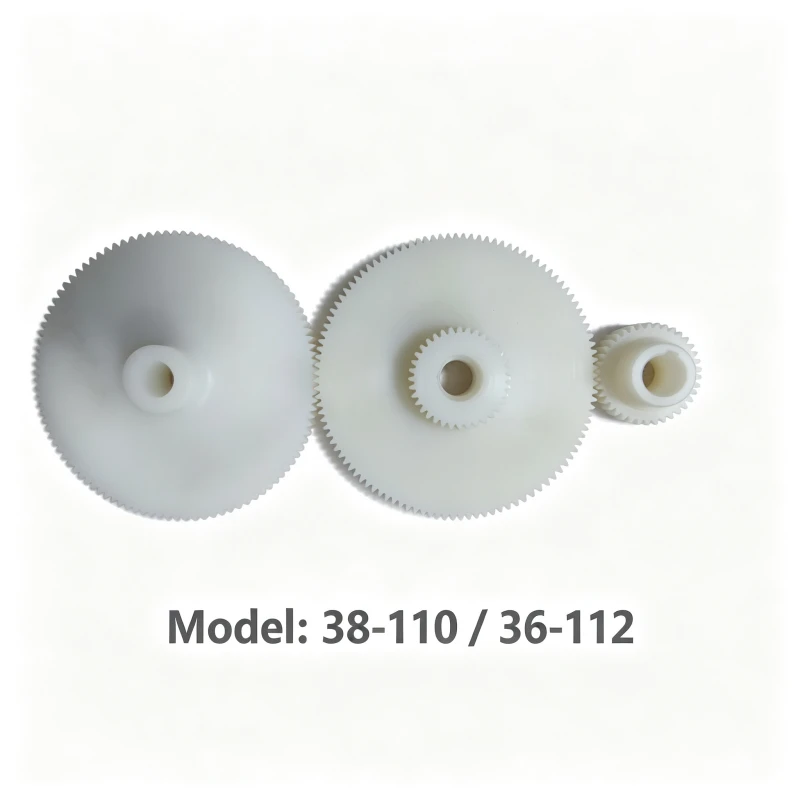
For example, if your motor’s maximum torque is 1 Nm at 1,000 RPM, and you need 0.02 Nm at the load shaft at 100 RPM, your gear ratio would be (1000 RPM / 100 RPM) = 10:1. That would give you a torque multiplication of ~9 (accounting for efficiency), so 1 Nm * 9 = 9 Nm at the gearbox output—way more than the 0.02 Nm you need. But wait, that’s overkill. You don’t want too much torque because excess torque can cause unnecessary wear on components like the EDM Plastic Gear in your gearbox. Plastic gears are common in smaller EDM axes for noise reduction, but too much torque can strip their teeth. We recommend aiming for a 1.5:1 to 2:1 safety factor between your required load torque and the gearbox’s rated torque. That’s enough to handle unexpected loads without stressing the system.
Another thing: speed. If you pair a gearbox with a ratio that’s too high, you’ll end up with a load speed that’s slower than needed. Wire EDM, for example, needs consistent wire feed speed (usually 1-10 m/min) to prevent wire breakage. If your gear ratio gives you a wire feed speed of 0.5 m/min, that’s too slow—you’ll get uneven sparks and wire breakages, which cost time and materials. We always tell customers to map both torque and speed to their specific EDM process specs, not just general guidelines.
Step 3: Prioritize Precision and Backlash for EDM’s Micro-Moves
EDM is all about precision. A 0.001-inch error in motion can ruin a part, so backlash in your gearbox is a big no-no. Backlash is the play between gear teeth when direction changes, and even small amounts (0.05 degrees) can cause lost steps in stepper motor systems. This is where not all gearboxes are the same.
Planetary gearboxes have less backlash than spur gearboxes, and we advise looking for ones with backlash ratings of 10 arc-minutes or less for EDM. For 4-axis EDM, where rotary axes need to turn with high accuracy, backlash can be catastrophic. We worked with a medical device manufacturer that was sinking EDM for implant parts—their initial gearbox had 30 arc-minutes of backlash, leading to a 0.005-inch error on critical part dimensions. Swapping to a low-backlash planetary gearbox fixed the issue, and they’ve been consistent ever since.
Another component to consider is the coupling between your stepper motor and gearbox. The coupling connects the motor shaft to the gearbox input, and if it’s not rated for EDM’s vibration and torque, it can slip or break. We recommend a Wire Drum Coupling for EDM because it’s flexible, handles misalignment, and resists the debris and oil common in EDM environments. Rigid couplings might seem fine, but they don’t absorb vibration, which can damage both the motor and gearbox over time.
Step 4: Account for Environmental and Durability Factors
EDM machine shops are tough environments. There’s dielectric fluid (usually deionized water), metal shavings, dust, and constant vibration. Your gearbox has to hold up to this, not just match torque and precision.
First, sealing. Gearboxes for EDM need to be sealed against moisture and debris. If a gearbox isn’t sealed, dielectric fluid can get inside, corrode the gears, and cause failure. When we supply gearboxes with our stepper motors, we specify IP65 or higher sealing for EDM applications—it’s worth the extra cost to avoid downtime from water damage.
Lubrication is another factor. Some gearboxes use grease that can break down in high temperatures or when exposed to dielectric fluid. Others use oil bath lubrication, which is more durable for heavy loads. For high-volume production EDM, oil bath gearboxes last longer, but for smaller prototype machines, a quality grease-sealed unit works fine. Just make sure the lubricant is compatible with EDM’s chemical environment—we always confirm this with our gearbox suppliers so our customers don’t have to guess.
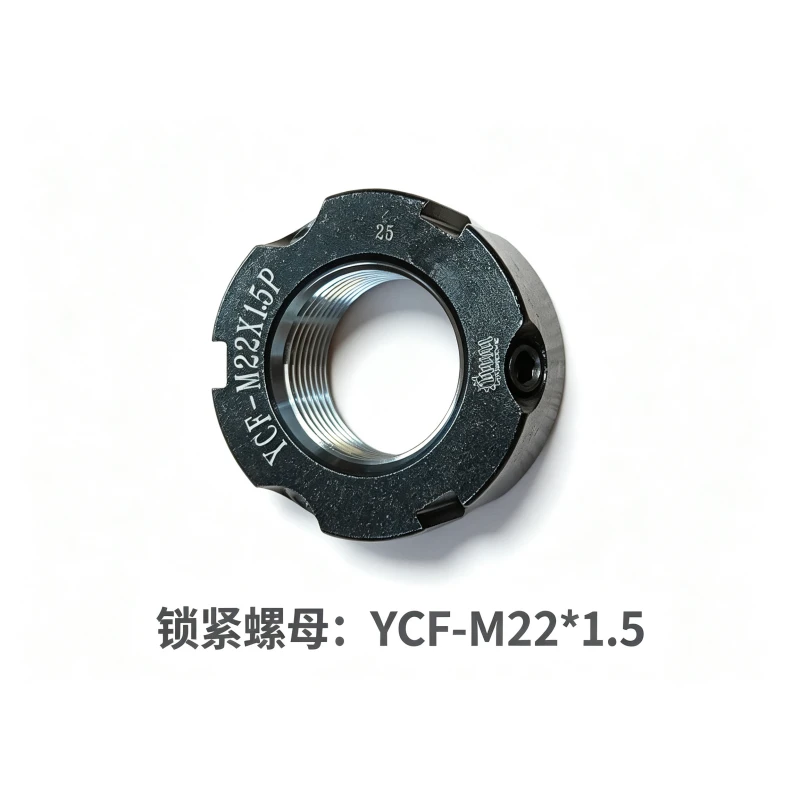
Also, consider components like the EDM Locking Nut that secures the gearbox to the motor and machine frame. Vibration can cause connections to loosen, leading to misalignment and lost steps. Using a locking nut designed for EDM ensures that your motor and gearbox stay aligned, even during long, uninterrupted runs. And don’t forget the power supply: if your stepper motor is rated for 24V, a gearbox that requires a different voltage will cause performance issues. We always match our motors’ electrical specs to the gearbox and machine control to avoid this.
Common Mistakes to Avoid (From Our 10+ Years in EDM Stepper Motors
Over the years, we’ve seen the same mistakes again and again. Let’s go over the ones that cause the most problems:
-
Underestimating dynamic torque: As I mentioned earlier, static torque isn’t enough. We had a customer who thought their load torque was 0.01 Nm static, but when they calculated acceleration torque, it was 0.03 Nm. They used a gear ratio that only delivered 0.015 Nm, and during acceleration, the motor skipped steps. They had to re-calibrate their entire system once they fixed their torque calculation.
-
Choosing the wrong gearbox type: Spur gearboxes are cheaper, but they have high backlash and lower efficiency. We’ve seen shops use them on wire feed axes and get wire breakages every 2 hours—swapping to planetary gearboxes with low backlash cut wire breakages to once every 12 hours.
-
Ignoring environmental factors: A customer in a hot, humid shop used a non-sealed gearbox. After 6 months, dielectric fluid had corroded the gears, and the gearbox seized up, taking the EDM machine offline for 5 days. Swapping to a sealed gearbox solved this completely.
-
Not matching the coupling: We’ve seen customers use generic couplings that can’t handle EDM torque. The Wire Drum Coupling for EDM is designed for this exact purpose—flexible enough to absorb misalignment, strong enough for EDM loads, and resistant to debris.
Final Checks Before You Install
Once you’ve mapped your load, chosen the right gear ratio and gearbox type, accounted for precision and environment, there are a few final checks to make sure everything works:
-
Test the system at low speed first. Run the EDM axis at its minimum speed and check for skipped steps or unusual noise. If you hear grinding or skipping, go back and verify your torque calculation or gear ratio.
-
Check backlash after installation. Use a dial indicator to measure backlash when reversing direction—if it’s more than 10 arc-minutes, you might need a different gearbox.
-
Verify all connections: Make sure the EDM Locking Nut is tight, the coupling is aligned, and all electrical connections are secure. Even a loose locking nut can cause misalignment that ruins precision.
-
Don’t forget small parts: Components like the Water Pump LDPB2-18 (for dielectric fluid) and EDM Plastic Gear should be matched to your motor and gearbox system. Using a pump that’s too weak can cause dielectric flow issues, which affect EDM performance, while a plastic gear that’s too small can strip under load.
Let’s Get Your System Working
Matching an EDM stepper motor with a gearbox isn’t rocket science, but it does require attention to the unique demands of EDM—precision loads, micro-movements, and harsh environments. The goal is to create a system that delivers consistent, accurate motion without premature wear or downtime.
If you’re not sure where to start, or you’ve tried matching components and still have issues, our team is here to help. We’ve worked with hundreds of EDM shops to find the right motor and gearbox combinations, and we can walk you through load calculations, gear ratio selection, and component pairing. Whether you need a replacement for an existing system or are building a new EDM machine, we can guide you to the right parts, including high-quality gears, couplings, and sealing components designed for EDM.
Don’t let a bad motor-gearbox match slow down your production or ruin parts. Reach out to us, and let’s build a system that works reliably for your EDM applications.
References
- EDM Precision Motion Systems: Load Calculation Guidelines, Machine Tool Engineering Journal, 2021
- Gearbox Selection for Stepper Motor Applications, Motion Control Industry Report, 2022
- Environmental Durability for EDM Components, EDM Technology Today, Volume 15, 2023
- Planetary Gearboxes vs. Spur Gearboxes for Micro-Motion Applications, Precision Engineering Magazine, 2022